
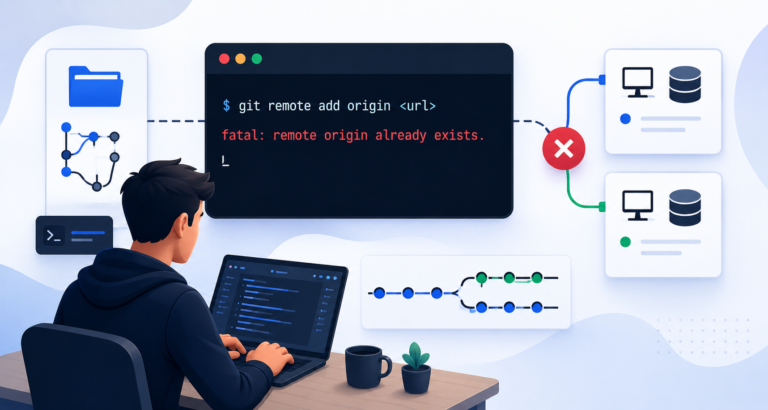

Introduction
The error: remote origin already exists message has been tripping up developers for years — yet most fix articles online hand you a numbered list without explaining which option actually applies to your situation. Before, you’d wade through four methods, try each one, and still feel unsure why it happened. Now, however, you can match the exact cause to the exact fix in under a minute.
Scrolling through r/github and the GitHub Discussions board reveals the same complaint repeated across dozens of threads: “I ran the fix from the tutorial and it worked — but I still don’t know what I changed or why.” Rather than jumping straight to commands, therefore, this guide starts with what every other article skips — So what does the word “fatal” actually. Why you have absolutely nothing to worry about when you hear the word “fatal”.
“Fatal” Does Not Mean Broken. Here Is What It Actually Means
The word “fatal”, in this error is really confusing. We need to understand what it really means.
In Git the word “fatal” simply means that the Git command could not finish what it was supposed to do.It’s the same prefix Git uses when you type a branch name wrong or make a typo in a flag — not an indicator that your repository is broken, corrupted, or damaged. So your commit history is still the same and nothing, on GitHub has changed. Your commit history is safe. Github is not affected by this.
Why Git Uses the Word “Fatal” (and Why It Misleads Beginners)
Git borrows “fatal” from Unix error terminology, where it indicates a non-recoverable process failure — but in practical terms, it just means “this specific command stopped.” Running git remote add origin with an existing origin is, in fact, a fully recoverable situation. You’re one command away from fixing it.
What “Origin” Is and Why Git Protects Its Name
“Origin” is not a reserved keyword — it’s simply a nickname. You can name your thing whatever you want like github or prod or myrepo. Git does not let two remotes have the name. This is like how your computer does not let you have two files with the name in the same folder. Git will not allow this because github remotes and other remotes, like prod or myrepo must have names.
This distinction matters because the error isn’t always that remote origin already exists. When trying to add a remote named “staging”, which already exists, Git returns an error message, and Git won’t allow you to add the remote “staging”.
Which Scenario caused Your Error? (Pick Your Fix From Here)
The right fix depends entirely on why the error appeared — and most articles never ask that question. After reviewing threads across r/github, GitHub Community Discussions, and Stack Overflow, four scenarios account for nearly every instance of this error. Identifying yours takes about ten seconds.
Scenario A: You Cloned a Repo. Now Want to Point It at Your Own
This is the thing that causes the problems. When you use git clone Git sets up origin to connect to the repository. Then if you try to use git remote add origin with the url of your repository you get an error message. This happens because Git already has origin set up. The reason is that Git already knows what origin is so it does not let you set it up again with git remote add origin and the url of your repository. Use Fix 1 (set-url).
Scenario B: You’re Following a Tutorial That Assumes a Fresh Repo
Tutorials assume you’re starting from scratch. If you already ran git init and linked a remote in a previous session — even on an unrelated project — and you’re now reusing that directory, origin is already configured. As a result, use Fix 1 or Fix 3 (rename).
Scenario C: You Want to Keep Both Remotes — Your Fork and the Original
The thing is, you do not need to change anything.The standard open-source contributor pattern uses two remotes: origin, for your fork and upstream for the repository.You are adding a remote, upstream to your repository. This means you will have two remotes: origin, for your fork and upstream for the repository. Use Fix 4 (add upstream).
Scenario D: The Error Is Appearing Inside a CI/CD Pipeline
Cached workspace directories from previous pipeline runs contain a .git folder with origin already configured. When the pipeline re-runs git remote add origin, it therefore hits the conflict immediately. Skip to the CI/CD fix section below.
4 Ways to Fix “error: remote origin already exists” — With the Right One for You
The fastest, safest fix for most developers is git remote set-url — it changes where origin points without deleting anything. Below are all four fixes matched to the scenarios above.
Fix 1 (Recommended): Use the command git remote set-url for changing the URL
Best for: Scenario A and B — cloned repos, tutorial redirects.
This command is non-destructive. It only updates where origin points — your commit history, local branches, and GitHub repository remain completely untouched.
Steps:
Confirm what’s currently configured:
git remote -v
Update the URL:
git remote set-url origin https://github.com/your-username/your-repo.git
Confirm that there is indeed a change:
git remote -v
Push to your updated remote:
git push -u origin main
HTTPS or SSH? Check your existing git remote -v output first. If the link starts with https:// go with an HTTPS URL.For links starting with git@github.com: use an SSH URL instead. Mixing formats after the fix causes authentication failures. See the official git-remote documentation for full URL format reference.
Note for Windows users: Git Bash, PowerShell and Windows Terminal basically work the way the terminal output is just a little different.
If the URL was a typo: If you get a “repository not found” error after running Fix 1 try running git remote set-url again, with the correct git repository url. No other recovery step is needed.
Fix 2 (Clean Slate): Remove and Re-Add with git remote remove
Best for: Broken config, corrupted remote setup, or a completely fresh start.
Important: git remote remove does NOT delete your GitHub repository. It only removes the local pointer in your .git/config file. Your remote repo stays exactly where it is.
Steps:
Remove the existing remote:
git remote remove origin
Re-add with your correct URL:
git remote add origin https://github.com/your-username/your-repo.git
Verify:
git remote -v
Push to your new remote:
git push -u origin main
Users on r/github consistently flag the same anxiety: they fear this command wipes their GitHub repo. In reality, though, it’s no different from deleting a desktop shortcut — the underlying application still exists, fully intact.
Note for Windows users: Git Bash and PowerShell and Windows Terminal all work with these commands fine.
Fix 3: Rename the Existing Remote with git rename
This is best for keeping the original remote and adding a new one, with a different name using git remote rename.
Steps:
Rename the existing origin:
git remote rename origin old-origin
Add your new remote as origin:
git remote add origin https://github.com/your-username/your-repo.git
Verify both remotes exist:
git remote -v
This approach works especially well when migrating from one Git hosting provider to another — you preserve the old remote as a backup until the migration is confirmed complete.
Fix 4 (Fork Workflow): Add a Second Remote Named upstream
Best for: Scenario C — open-source contributors with a forked repository.
Technically, you don’t have an error in the traditional sense. You already have origin correctly pointing at your fork. What you need instead is a second remote pointing at the original repository. For more on this workflow, see GitHub’s guide to managing remote repositories.
Steps:
- Keep your existing origin (your fork) exactly as-is.
Add the original repository as upstream:
Now you have to use Git to add the remote repository, which is done using the following command:
git remote add upstream https://github.com/original-owner/original-repo.git
Verify both remotes:
git remote -v
Now you should see both the origin, which’s your fork and the upstream, which is the source repository, listed separately.
Quick Reference: Which Fix, for Which Scenario
| Scenario | Recommended Fix | Risk Level |
| Cloned repo, want your own origin | Fix 1 — git remote set-url | None |
| Tutorial on existing repo | Fix 1 or Fix 3 — set-url or rename | None |
| Want two remotes (fork + original) | Fix 4 — add upstream | None |
| Broken config, start fresh | Fix 2 — remove and re-add | None (local only) |
| CI/CD pipeline re-run conflict | See CI/CD section below | None |
git remote set-url — Why This Is the Fix Most Developers Should Use First
git remote set-url wins on three counts: it’s a single command, it’s atomic, and it never leaves your repository in a broken intermediate state.
Compare that to Fix 2: git remote remove followed by git remote add. Between those two commands, your repository has no remote configured at all. If your terminal crashes — or you fat-finger the second command — you’re consequently left with an empty remote config. With set-url, by contrast, there’s no gap, no partial state, and no recovery step required.
Why It’s Safer Than Remove-and-Re-Add
With set-url, providing the wrong URL simply means running the command again. The command either succeeds or fails cleanly — it never leaves partial state behind. That’s exactly the behavior you want when you’re already frustrated and simply need to unblock your workflow.
HTTPS vs SSH: Which URL Format Do You Actually Need?
Reading your git remote -v output before running the fix takes five seconds and prevents a frustrating follow-up error. Two URL formats exist:
- HTTPS format: https://github.com/your-username/your-repo.git — authenticates via personal access tokens
- SSH format: git@github.com:your-username/your-repo.git — authenticates via SSH keys
Switching from HTTPS to SSH (or vice versa) during the fix without updating your credentials triggers an authentication error immediately. Therefore, always match the format to whatever auth method you currently have configured.
Not Using the Terminal? Fix It in VS Code or GitHub Desktop
GUI users hit this error too — and fortunately, the fix works identically, just through a different interface.
VS Code: How to Change a Remote URL in the Source Control Panel
VS Code’s Source Control panel calls the same underlying Git commands as the terminal. Here’s the exact path:
- Open Source Control with Ctrl+Shift+G (Windows/Linux) or Cmd+Shift+G (Mac)
- Click the three-dot … menu at the top of the panel
- Navigate to Remote → Edit Remote
- Update the URL and confirm
Behind the scenes, VS Code runs git remote set-url, producing a result identical to Fix 1.
GitHub Desktop: Changing the Remote in Repository Settings
GitHub Desktop makes this even more direct than the terminal. To fix the issue through the GUI:
- Click Repository in the top menu
- Select Repository Settings
- Go to the Remote tab
- Update the Primary remote URL field
- Click Save
Since GitHub Desktop also runs set-url internally, the end result is identical to running Fix 1 in a terminal. For GUI-first developers, this is the cleanest path to the fix without touching a terminal at all.
Getting This Error in GitHub Actions or GitLab CI? Here’s Why and How to Fix It
This scenario goes uncovered in most other articles — and it’s among the most frustrating because the error appears without the developer doing anything obvious to trigger it.
Why This Happens in Automated Pipelines
Cached workspace directories from previous pipeline runs contain a .git folder with origin already configured. When the pipeline re-initializes and runs git remote add origin, it therefore conflicts with the cached config immediately.
This isn’t a code problem — it’s a workspace hygiene problem. The GitLab runner bug tracker (#4110) documents this exact pattern: jobs run fine on a fresh worker, then break consistently on any worker that reuses its build directory.
3 Ways to Fix It in GitHub Actions / GitLab CI
Fix A: Clean checkout (recommended)
Add clean: true to your actions/checkout step in GitHub Actions:
– uses: actions/checkout@v4
with:
clean: true
This wipes the workspace before each run, eliminating cached .git directories entirely.
Fix B: Conditional set-url (for complex pipelines)
Rather than removing the remote unconditionally, check whether origin exists before attempting to add it:
if git remote | grep -q origin; then
git remote set-url origin $REPO_URL
else
git remote add origin $REPO_URL
fi
This script handles both fresh and cached workspaces without failing either way.
Fix C: Remove remote in a pre-step
Alternatively, add a cleanup step before any git remote add command:
git remote remove origin 2>/dev/null || true
git remote add origin $REPO_URL
The 2>/dev/null || true silences the error if origin doesn’t exist yet — making this safe for both fresh and cached environments.
How to Never See This Error Again — 3 Habits That Actually Prevent It
One check prevents this error permanently, and it costs about two seconds to form the habit.
Always Run git remote -v Before Adding a Remote
Before any git remote add command, run:
git remote -v
If origin appears in the output, use set-url instead of add. As a result, this single habit eliminates the error 100% of the time. Think of it like checking whether a file exists before creating it — two seconds upfront saves ten minutes of debugging later.
When Following Tutorials: Check for Existing Remotes First
Most tutorial errors happen because the reader already has a configured repo directory while the tutorial assumes a clean slate. Adding one mental step to your tutorial workflow makes all the difference:
- Read the tutorial’s prerequisites section first
- Run git remote -v before following any git remote add instruction
- If origin already exists, decide whether to update it or start fresh
In CI/CD: Always Use clean: true or an Equivalent Workspace Wipe
For any pipeline that clones a repo, set clean: true in your checkout step or configure GIT_CLEAN_FLAGS: -fdx in GitLab CI. One YAML line, and you consequently eliminate remote conflict errors across all future pipeline runs.
Conclusion
The error: remote origin already exists is one of Git’s most benign errors wrapped in its most alarming language.Fix 1. Using git remote set-url. Usually fixes the problem for developers with just one command. This way there is no risk, to their commit history or the remote repository.. To really fix the problem quickly you need to know what caused the error in the first place. If you know that you can fix it in a couple of seconds. If not you might have to spend ten minutes trying to figure out what is going on.
Git tools are getting better all the time. VS Code and GitHub Desktop now surface remote configuration directly in their interfaces, and GitHub Actions’ clean: true flag has made CI workspace conflicts far less common than they once were. Run git remote -v before your next git remote add command, and you’ll likely never see this message again.
No — git remote remove only deletes the local pointer in your .git/config file. Your GitHub repository stays completely accessible and intact for anyone with the URL.
set-url updates the URL of an existing remote in one step. remove deletes the entry entirely, requiring a follow-up git remote add. Both leave your commit history and remote repo unchanged.
Run git remote -v in your project directory. If origin appears in the output, use git remote set-url origin [url] instead of git remote add origin [url].
Yes. The standard pattern is origin for your fork and upstream for the source repository. Running git remote add upstream [url] adds a second remote without touching your existing origin configuration at all.